Wednesday, August 31, 2011

Hybrid Favorites: Bone Folder

Pin It


Happy Wednesday and welcome to another edition of Hybrid Favorites where we share our favorite tools to create hybrid creations. Today, I'd like to highlight one of the understated staples in my tool kit: the bone folder.

A bone folder can be purchased at any craft store and my favorites are from Martha Steward and Ranger.
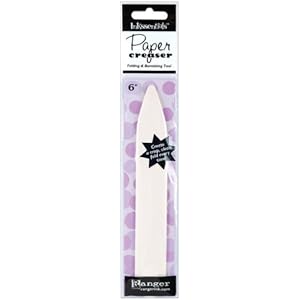
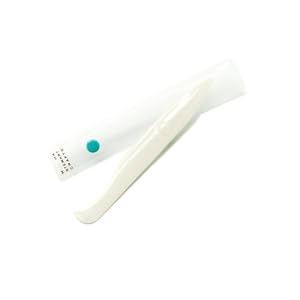
Photo source: Martha Stewart bone folder, Ranger paper creaser

It creates crisp and clean folds on all of your hybrid projects. Holding the bone folder between my thumb and pointer finger, I drag it across the fold to crease the edge for cards or create a scored line using a ruler for a straight line and the back side of a mousepad underneath to create indentations to fold. It makes hybrid crafty easy peasy and is a must for your hybrid tool kit.


Pin It

Sunday, August 28, 2011

Reader Challenge Reminder!

Pin It

Hi, Jennifer here to remind you that you have one more week to post a hybrid project in Krisi's ScrapMatters gallery for a chance to win a gift card! Check out some of these projects that have been posted already this month:

By sunshinetk using Print It: Messy Memories Wall Art


By scrappymelly using Print It: Messy Memories Wall Art


By knlchevys using Pillow Box Door Hanger

Pin It

Friday, August 26, 2011

Wall Art: ABC’s and I {heart} U

Pin It

I have really enjoyed creating some fresh, new and funky art for our house.

Last weeks winner of Making Memories Wall Art is Chris – please contact me so I can get you your certificate for Making Memories!

This week I have a new piece I made up for my daughters room. I went ahead and included the full alphabet to make this an even more versatile product.  Customize the colors yourself – change items out for alphas from your favorite digital scrapbooking kit. The possibilities are endless.

Should you need a JPG with custom colors please let me know and this service will be available for an additional $5.

i{heart}u

hi

And a better look at the I {heart} U – you can easily change the colors of the I, heart and U in any photo layering software. I have included PNG, PSD, and TIFF files for your convenience in that.

kk_waabcihu_i-{heart}-u_8x1

And this fun way to use the whole alphabet from Tamara:

Alpha_WallHanging_Boy

What a easy {and cheap} gift for a friend.  I would love to see what you create – and don’t forget when you upload your creations to my designer gallery you have a chance at a $5 gift certificate to my store each month!

Let’s give one away this week as well! Just leave a comment with who might love a fun wall art print created by you.  For extra entries share this giveaway on your facebook page or twitter account– linking them to this post!

There is a speed scrap planned for tonight, I won’t be able to make it but sounds like lots of fun!  Head over to ScrapMatters tonight and play.

Sig

Pin It

Wednesday, August 24, 2011

Tutorial: Pendant Gift Box

Pin It

Hey everybody!
It's LeAnn, here, with a twist on Krisi's Small Square Box from her Box It Up collection.

[editorial comments] Pssssssst!  This is the free template you get when you sign up for Krisi's newsletter!  If you haven't signed up yet, you should!  This box ROCKS!  [/end editorial comments]


I am using Krisi's small square box with Allison Pennington's "In My Own Backyard" kit 
to make a gift box for a glass photo pendant I made for a friend of mine.


First, a look at my supplies:


Pretty simple tools, right?  Of course, after I looked at the photo, I realized I left out two things:  the velcro and the paper Easter grass!  Oops! 


Start by applying your choice of papers and elements to Krisi's template.  Print and cut out the shapes, and then score and cut the slits.


Fold the box and glue the flaps in place.  (I was amazed at how SIMPLE and FAST this box is to put together!)


Glue the sentiment circle to the front of the box.  Then punch holes about a quarter of an inch from the outside edges on the very top panel of the box.


Place the pendant (already threaded with ribbon) in the box and feed the ribbon up through the holes in the top of the box.  Pull the ribbon tight and tie a bow.


Add a small piece of velcro to hold the lid in place.


Stuff just a *bit* of paper Easter grass into the bottom of the box so that the pendant doesn't bang around inside (plus, it looks cute!).  Voila!  You're done!


Hope you enjoyed this tutorial!
Have a great day!
LeAnn


Pin It

Monday, August 22, 2011

Manic Monday - Tumbler Insert on sale!

Pin It


Hi everyone!

Rebecca (reboscraps) here to let you know about the AWESOME template on sale today for Manic Monday: the Tumbler Insert template! I know, I know, you are probably wondering if it really is that awesome, but can I tell you a secret? This is my very favorite Krisi's Kreations template, the one I have used over and over and over! Today only, you can snap this template up for just $2.00!


This is a great template if you've never tried hybrid, because the only thing you have to do post-design is get out your favorite pair of scissors. No glue or glitter required; unless, like me, you find you can't resist. You can find insulated tumblers various places, mine is from that popular coffee company with the mermaid logo. Use Krisi's template to design your insert, print, trim it down and slide it in to your tumbler.

True confessions: I like to give my tumbler a new "outfit" every once in a while, so I thought I'd share a few of my favorites with you. Last Christmas, I made this bright and happy "Holiday Tumbler":


This one is all about the fun doodles and sketched letters with my name, "Rebecca's Coffee Tumbler":


And I can't resist sharing this one. I don't have a photo of this design in my tumbler, but it's so much fun! The "Scrapoholic Tumbler":


Ready to try it out for yourself? Don't miss this great deal! The Tumbler Insert template is just $2.00 today only!

Pin It

Friday, August 19, 2011

Making Memories–Customizable Subway Art

Pin It

I have a fun item available this week – something you can either just print as is or use your “photoshop” skills and change it up to match your home.


See how the CT fixed it up:

Memories-Art
Tracy

mess2
Dalis

or you can leave it as is and simply get it printed and frame it:

memories---wall-art
{frame from Here Kitty Kitty from Chelle’s Creations}

EDITED – I am now offering customization of my word arts if you would like one in specific colors. You can view the product in my store at Scrap Orchard HERE

Grab it before Sunday and get 20% off!

If you want to win a copy for FREE – just leave a comment here on my blog with what room you would put this up in.

Want an extra chance to win? Leave an additional comment (new entry) with a quote you would like to see me create. You could win this one AND if I decide to use your quote that one as well!

See you Sunday – I have a few scrapbook pages to show you this week!

Sig

Pin It