Thursday, March 8, 2012

{Tutorial Thursday} Recoloring word art

Pin It

This week I released a couple products…
Write It: Spring Sentiments Digital Stamps by Krisi's Kreations

Daily Life: Daily Border Journalers by Krisi's Kreations
and
Shaped Cards {Spring} by Krisi's Kreations

Yep – three things this week – check back tomorrow to see them in action!

I want to show & tell you how to recolor the word art.

If you want to recolor the entire PNG file here is one way that you can do that (there are multiple methods to do this – but this is the way I do it).

In PSE and Photoshop -

Open the file you want to change – it is a PNG file.

Choose the color you want to change it to (using your color picker).

Go to Edit > Fill Layer. Choose a color (a drop-down menu gives you options for color, foreground color, background color, etc). You must have Preserve Transparency checked to
recolor just the word art not the entire layer.

In Microsoft  WORD
Open the file – Insert > Picture > From File to open the .png file.

With the word art selected go to Format > Picture. From the menu on the left select Picture. Find the drop-down menu called Recolor under Image Control. Select the color you want and click ok.

But… what if you want to recolor the word art in two different colors? You can do it in PSE & Photoshop.

recolor1

You need to get the different parts on different layers so to do that, select the first word you want different. You can use the lasso tool or the box selection tool.

recolor2

Once you have the selection around the word(s) you want follow the directions above -

Go to Edit > Fill Layer. Choose a color (a drop-down menu gives you options for color, foreground color, background color, etc). You must have Preserve Transparency checked to
recolor just the word art not the entire layer.

recolor3

Here is a beautiful example from Cathy that shows the word art in two different colors.

FriendsFlowersWEB

Try it and and show us what you create – this works for both hybrid projects and layouts. Link us up and show us what you created!

See you tomorrow!

Pin It

Wednesday, March 7, 2012

{Wacky Wednesday} Recipe: Crock pot Lasagna

Pin It

Do you love lasagna?  But you don't love all of the work involved to make it?  Today I'm going to share a recipe for making lasagna in the crock pot! Yes, the crock pot!


Ingredients:
1 to 1.5 lb ground beef
1 medium onion chopped
1 can (29 ounces) tomato sauce
1 can (6 ounce) Italian style tomato paste
2 teaspoons Italian seasoning
1 container (15 ounces) part skim ricotta cheese
1 cup grated Parmesan cheese
3 cups shredded mozzarella cheese
12-15 lasagna noodles uncooked (no boil kind work great)

Brown ground beef and onion in skillet until the meat is thoroughly cooked, drain.
In a bowl, stir together the tomato sauce, tomato paste, and Italian seasoning.
Add this to the meat, stir. Set aside.
In a separate bowl, combine the ricotta, Parmesan and 2 cup of the mozzarella cheese. 
Spray inside of crock pot with non-stick spray (or use a crock pot liner).
Cover bottom of crock pot with about 1/4 of the sauce/meat.
Layer lasagna noodles to cover. Break up the noodles to cover more area.
Top the noodles with the 1/2 the cheese mixture.
Top the cheese mixture with 1/4 sauce/meat mixture
Top with more lasagna noodles
Top with remaining cheese mixture, then 1/4 of the sauce/meat mixture.
Top with more lasagna noodles and finally the remaining sauce/meat mixture on top.

Cover and cook on low heat setting about 4-6 hours. ( I found it to be done at 4 hours)
Sprinkle the top of the lasagna with remaining 1 cup of mozzarella cheese, cover and let stand 10 minutes or until cheese is melted.

Makes 8 servings


You can make it up the night before and place the filled crock pot insert in the refrigerator. In the morning before you head of to your busy day, put it in the crock pot and turn it on.  Now you can have lasagna in a jiffy, even on a weeknight!

Mangia!  Enjoy!
Cathy

Pin It

Tuesday, March 6, 2012

{Project Life} Week 9

Pin It

Another week has gone by… where have the last 9 weeks gone? I am getting very excited for Digiscrapapalooza in Las Vegas in just a few weeks. If you have not registered yet – go do it now there is still time. We are going to have SO much fun!

Had fun putting together this weeks pages – next week will be tough as I work Sat, Sun & Monday so hoping I can squeeze in a little scrapping time. I am really loving that I am staying caught up and documenting life – the everyday stuff.

Here are my pages for this week – not as colorful as last week, but that green is a favorite color of mine.

wk9a-webwk9b-web

wk9a-web

wk9b-web

Products used:

Chelle’s Creations – Spring Cleaning – love the colors in this kit & Doodle Border It (no longer available)
Valorie Wibbens – Pockets No. 3 The Basics
Font – My own handwriting and Pea Noodle Parlor

Are you doing Project Life digitally? Link up your blog (a link back is very appreciated) and share your pages with us!


Oh and if anyone is interested head over to Wild Blueberry Ink she has a freebie for Project Life and is doing a giveaway of a Cansolidator!

Linking up to

The Mom Creative

and

Pin It

Monday, March 5, 2012

{Monday Mix} Tagged & Pinterest Inspiration

Pin It

I thought I would just quickly share to go check out the Scrap Orchard blog today… and see a great post written by the Hybrid Bees. It talks about ways to create a quick hybrid project {and I am giving away a little freebie}.

Here is a look at the freebie – you need to head over there to get it though.

kk_tagitv1_freebie_preview

Now here are a few inspiration images on other ways to use your free tag template:

Pin It

Tuesday, February 28, 2012

{Wacky Wednesday} Happy Leap Day, giveaways & early releases

Pin It

Some interesting Leap Day facts (courtesy of examiner.com)

The following fun facts about leap year were collected from Leapyearday.com and Womens-Place.com:

  1. Your chances of being born on a leap day are approximately 1 in 1500.
  2. There are about 187,000 people in the US and 4 million people in the world who were born on Leap Day.
  3. People born on Leap Day are called leaplings.
  4. In most states, leaplings must wait until March 1st to be eligible for any age-specific privileges (ages 16, 18, 21).
  5. Every now and then we have to skip a regularly scheduled leap year. This happens during specific century years.
  6. Century years are not leap years unless they can be evenly divided by 400. The years 1700, 1800 and 1900 were not leap years, but 1600 and 2000 were.
  7. When 2/29 is entered into a majority of websites it comes up as an invalid birth date.
  8. US Presidential elections and Summer Olympic Games are both held every four years and occur during leap years.
  9. In Greece, people believe it is bad luck to get married in a leap year. On the other hand, in Ireland, women can propose to a man.
  10. The next February 29th will come around again in 1,460 days.

Have any fun facts to share… or is today your birthday?


Head over to the Scrap Orchard blog to win my messy memories subway art or head to Wild Blueberry Ink to win a Cansolidator Pantry from Shelf Reliance. While over at Wild Blueberry Ink check out her Project Life freebies as well.


Leap day is here!  For one day only the new releases in the Market are 29% off.  I have two new items for you…

Create It {Leaves & Stems} by Krisi's Kreations


Create It {Flowers v.1} by Krisi's Kreations

Leap on over and grab them now.

I have to share this HUGE collection that Chelle’s Creations is releasing this week … and it is on sale for Leap Day as well.  You should see some of the layouts coming out of this collection – plus is is a great stash builder – use these to supplement kits you already have.  It is nearly 50% off with the bundle discount and the new release sale – grab it today!

Pin It

{Project Life} Week 8

Pin It

Seriously loving this project!   This week I remembered to use the day of the week labels (have to add them to my other weeks!).  I just love that as of Saturday I am caught up with 2012 scrapping… what an awesome feeling!

wk8a_webwk8b_web

wk8a_webwk8b_web

Products Used:

Valorie Wibbens – Pockets No. 3 The Basics
Miss Tiina – Live Free Love Life Freebie Journaling Cards
Gina Miller Designs – The Bliss Project Journaling Cards #1
Chelle’s Creations – Bug Catcher (background rainbow paper)

Check out Scrap Orchard’s blog post today – they are giving away one of my Subway Art templates.  Be sure to check out my blog tomorrow … I have some special Leap Day information!

Now… link up your digital pages here {a link back here is always nice… other people want to see more pages too!)


Linking up to

The Mom Creative

and

Pin It

Monday, February 27, 2012

{Monday Mix} Foam Dots

Pin It

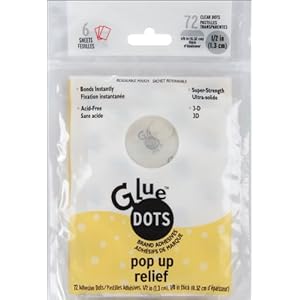
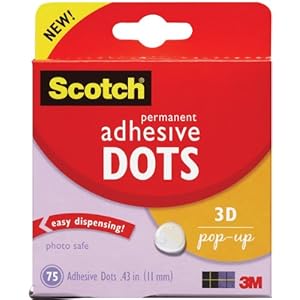
Hi everyone and welcome to another edition of Monday Mix. Today, I'd like to share with you one of the easiest ways to add additional dimension to any hybrid project: pop dots.

Pop dots are available in many different thicknesses and sizes. Similar to a glue dot, pop dots adhere but also have additional foam in order to create pop up and 3D effects.


In the project below, I used pop dots to accentuate the butterflies and flowers by attaching the additional pieces with 1/2 inch pop dots for the larger butterflies and 1/8 inch pop dots for the smaller flowers.
Next time you're looking to add some quick additional dimension to a project, reach for a few pop dots for that extra pop!

Pin It