Showing posts with label Monday Mix. Show all posts

Monday, March 5, 2012

{Monday Mix} Tagged & Pinterest Inspiration

Pin It

I thought I would just quickly share to go check out the Scrap Orchard blog today… and see a great post written by the Hybrid Bees. It talks about ways to create a quick hybrid project {and I am giving away a little freebie}.

Here is a look at the freebie – you need to head over there to get it though.

kk_tagitv1_freebie_preview

Now here are a few inspiration images on other ways to use your free tag template:

Pin It

Monday, February 27, 2012

{Monday Mix} Foam Dots

Pin It

Hi everyone and welcome to another edition of Monday Mix. Today, I'd like to share with you one of the easiest ways to add additional dimension to any hybrid project: pop dots.

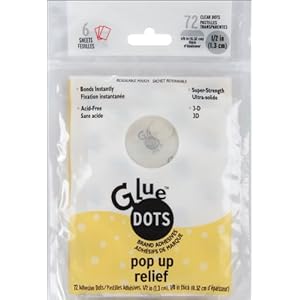
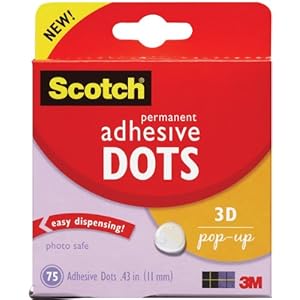
Pop dots are available in many different thicknesses and sizes. Similar to a glue dot, pop dots adhere but also have additional foam in order to create pop up and 3D effects.


In the project below, I used pop dots to accentuate the butterflies and flowers by attaching the additional pieces with 1/2 inch pop dots for the larger butterflies and 1/8 inch pop dots for the smaller flowers.
Next time you're looking to add some quick additional dimension to a project, reach for a few pop dots for that extra pop!

Pin It

Monday, February 20, 2012

{Monday Mix} Inspired by Pinterest

Pin It

Hi, everyone, it's Rebecca (ReboScraps) here with a hybrid project inspired by Pinterest. I spotted this clean & simple project which makes a great sweetheart gift, and just loved the clean simplicity and personalization.
Source: etsy.com via Rebecca on Pinterest


With some more surfing, I spotted a birth announcement by the same creative mind, this image composed with big bold numbers.
Source: etsy.com via Rebecca on Pinterest


I decided to make my own birth memento, combining the image of the home state with birth statistics. There's a great font available that includes dings of each U.S. state and some other shapes, too. It's called "Ding Maps" and you can find it at Fontspace. I clipped a bright paper to the map, and a solid light grey to the background. Then I printed two copies, cut out the California shape, and attached it to the background using foam dots for extra dimension. I love how it turned out, and it was so easy! 
Product credits and suggestions:
- Digital Papers from Hole in One by Chelle's Creations
- See Through You Buttons by Chelle's Creations
- Fonts are Pharmacy MMX and Ding Maps

Pin It

Monday, February 6, 2012

{Monday Mix} Hand Sanitizer - Free Valentine Printable

Pin It

Sorry this is coming to you a little late in the day… but I wanted to get this freebie printable together for you.  Be sure to stop back later tonight to see this weeks Project Life and link up your own digital Project Life pages.

This is what my 2nd grader is going to be giving out for Valentine’s Day this year, hand sanitizers from Bath & Body Works with these cute tags on them.

krisiskreations_val_preview

Want your own?  Sure thing. I made up a set of printables – two different actually. One for boys & one for girls.  I kept them as simple circles so you can use a 2” circle punch (scalloped or regular) to make them quicker. Each sheet includes 12 tags on each one.  There is a large area around each middle to give some “oops” coverage! Simply cut them out and punch a hole – we used a heart hole. Before you get them tied on have your little one sign the back of them.

krisiskreations_val_preview

Download with 4Shared or Dropbox

If you missed my new releases this week, it included a set of tags and a handle box which would be perfect for bigger valentine gifts.

Tag It: v.1 by Krisi's Kreations

Box It: Handle by Krisi's Kreations

Be sure to check out Thrive Food Home Store for information on nutritious freeze dried foods, food rotation systems, emergency preparedness items, and camping supplies.


Linked up with – let me know if you have a link party that you would like to see this linked up with!

Skip to my Lou
A Little Tipsy
ABC’s and 123’s
Sassy Sites
http://www.pollywantacrafter.com/
http://ninthstreetnotions.com/

http://sewcando.blogspot.com/

http://sewchatty.blogspot.com/

http://www.thegirlcreative.com/

Sig

Pin It

Monday, January 30, 2012

{Monday Mix} Hybrid vs. Printable

Pin It

This is the time of year for healthy competition. The NFL Conference playoffs are completed and the Super Bowl is just around the corner, The Daytona 500 is coming up, and the Rumble in the Orchard is going strong! Design Teams for the various designers at Scrap Orchard are having fun and providing lots of inspiration. Stop by when you get a chance and vote for Krisi's team!

All this competition got me to thinking about hybrid crafting and the many options it opens up to a paper crafter. It's Cathy (Scrappycath) here with a look at two different ways to make a hybrid card using digital elements.  I'm going to compare a "digital printable", and a "print, cut and assemble" card.


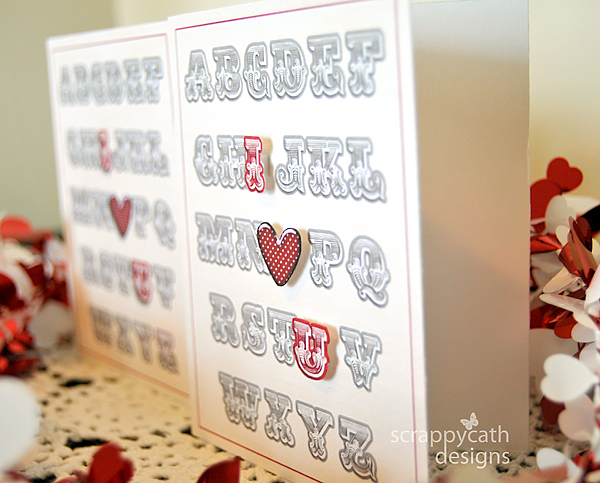
In the photo above, which card is a digital printable? Which one is print, cut, and assemble?  Can't tell?  A digital printable is a card that you design using your photo editing software completely and then just print it out. A print, cut, and assemble card is one that you design in your photo editing software, but print elements separately, cut them and build the card physically.  Each way gives you a beautiful card.  So, do you give up on which card is which?  Keep reading....


I created the cards in Photoshop using the Wall Art: i {heart} u and ABC's template by Krisi's Kreations. I also used the alpha from the digital kit My History by WM Squared Designs. I recolored the I and the U with a digital paper from another digital kit, Je t'aime also by WM Squared Designs. The heart is from a digital kit called Rebel by Joyful Heart Designs.  On one card design, I included the I, heart, and U with shadow. On the other card I printed those elements separately. I cut them out and adhered them to the card using foam dots.

Have you figured out which card is which?


The one on the right is the print, cut, and assemble.  By this angle, you can see how I raised the I, heart, and U using the foam dots. This really gives the card dimension.  If you are mailing your card, you may not want the added dimension.  In that case, you can simulate the look of the raised elements by applying a deeper shadow to the elements in your software before printing them out.

There you have it. Two different ways to create the same beautiful hybrid card!

Pin It

Monday, January 23, 2012

{Monday Mix} Hybrid Home

Pin It

Hi, everyone! It's Rebecca (reboscraps) here with a quick and easy tutorial for you. When I saw the Plan It: Menus in Krisi's shop, I knew it was the perfect thing to cute up the fridge. I've often made lists of what's for dinner, but always on scraps of paper here and there. I used her Menus template and cute digi scrap supplies to make a permanent fridge list that I can reuse again and again.

I started with these two products from the Scrap Orchard Market, first of course is, Krisi's Plan It: Menus


and I added papers from the Family Reunion Collab by Jady Day Studio and Suzy Q Scraps


I liked the vertical template best, so I designed my project, and printed it out:


I'm going to show you how I laminated mine, but if you don't have a laminator you could simply slide this into a standard letter-size page protector and trim the side with the holes. This would be a super quick and easy way to make your menu reusable, and it would look something like this:


You might notice that because of the printer margins, I ended up with some white borders on my printout. I decided I would trim those off:


Another option would be to layer your scrapped print with a solid sheet of paper if you prefer a bordered look, like this:


The layered look would probably work great if you use a page protector, but I wasn't sure the thickness of the paper would work in my laminator, as I haven't done a lot of experimenting with it yet. I decided to skip the extra sheet of paper, and I actually like that my project will have a little extra lamination around the edges, I think it will give it some added durability. Here's my project ready go through the laminator:


A quick trip through the laminator:


After it was stuck together, I added some peel and stick magnets to the back, and the project was ready to look cute on the fridge!


Now, I just have to plan some menus!

Linked up to:

Pin It

Tuesday, January 17, 2012

{Friday Fun} & {Monday Mix}

Pin It

Ack! I forgot to post on Friday with all the fun stuff the girls created with my new goodies!  This is also a perfect Monday Mix … since this is such an easy way to add hybrid into your home!

So let me show off this fun release – and if you need to know how to customize it yourself – check out this tutorial.

Heather
messy_heather

Sharon
messy_sharon

Lori
messy_lori

Caro
messy_caro

They used this product {which is spreading all over Pinterest lately}


and for those of you who don’t have the ability to recolor I created this product so you can spend a little extra and have me customize it for you.

Wall Art: Custom JPG by Krisi's Kreations

Pin It

Monday, January 9, 2012

{Monday Mix} Gleening inspiration from Pinterest

Pin It

I try not to spend to much time on Pinterest – it is awfully addicting! I have found that I like to browse on my iPhone and pin ideas there.  I have pinned a few Valentine’s projects that would work beautifully as hybrid projects – here are a couple of them.

When I first saw this one I immediately thought of the fun bright colors in so many digital kits – the back part and the robot could all be digital and just add the candy bar wrapped in digital paper, google eyes and the felt heart.  Love it!

Source: bhg.com via Krisi on Pinterest


So many fun zoo kits out there… this would be fun and simple digital!

Source: fiskars.com via Krisi on Pinterest


How easy would these be? Create the scallop tag digitally and simply punch them out!


And then there is this template that I previously released. It is not yet in my store at Scrap Orchard but if you want it to be… let me know and I will get that done!


Have you made something from Pinterest using digital supplies? I would love to see – link me up to where you posted them in a gallery!

If you would like to follow me over on Pinterest you can find me here.

Pin It

Monday, January 2, 2012

{Monday Mix} Organizing with Hybrid

Pin It

Welcome to our first week of Monday Mix, be sure to bookmark or subscribe to the blog so you don’t miss anything.

Many people look at the beginning of the year as a fresh start – I know I do. And one thing I have been doing TONS of is cleaning and clearing out.  I went through my spice cupboard just before Christmas and even though I use it at least 3 times a week I was reminded of this fun project I did a couple years ago and thought I would share.

savings-jar

What other things can you do with baby food jars? Organize anything small.  It might be out in the garage with screws, nuts or bolts or maybe on the desk holding those small annoying erasers that go over the old eraser, and don’t forget to use them in the craft room for eyelets and brads.  And then of course right in your kitchen for spices & seasonings.

Salt-Jar-Preview

Get creative with what you combine from home with digital scrapbooking designs and create fun projects to give or keep.

Show me what you are doing to include digital scrapbooking with organization.

Sig

Pin It