
Hello everyone! I'm Jen, a member of Krisi's Creative Team. I'm excited to be doing a tutorial today. I don't know about you, but our house always feels so bare after Christmas. Especially because we are still adding little things here and there to our decorating, even after living in our home for three years! I love adding fun, personal touches to things, and this weeks new release is perfect for a personal decor piece! Plus, it's very fitting to all of us moms. I know I feel overwhelmed trying to clean and entertain my son, and I've had to learn to just let the cleaning go sometimes. It will be even more true once our newest son arrives next month!
Anyway, let's get going with the tutorial! If you haven't seen it yet, this week's release is this:

So cute and fun! The image is linked so you can go right to the store! And you can personalize it any way you'd like. The digital kit I chose to use for this is a newer release by Chelle's Creations called "Spic N' Span". I love the colors and the elements are darling. Here are the steps for personalizing your own wall art (I am using Photoshop Elements 9 for this).
Wall Art Tutorial
1. First, download and unzip your file.
2. Open your file in whatever program you are using.

3. Next, find the kit you are going to use and begin to open the different files you think you want to use (I just drag and drop them into my program from the folder-much faster!)

4. Now, you will want to "clip" your papers to the different layers. Making sure that your background layer is highlighted in the "Messy Memories Wall Art" window, drag the paper you want to use onto the wall art. Then, clip that paper to the background. Do the same with each subsequent layer. (In Photoshop Elements, press Control "G" to clip things to layers) Resize the papers to your liking.

The highlighted area on the right (bottom) is where I clipped the paper to the background layer.
5. Next, after clipping your papers, you can begin to personalize it by adding elements and shadows.
5. Next, after clipping your papers, you can begin to personalize it by adding elements and shadows.

6. When you have everything looking the way you'd like, go ahead and save it (be sure to save it as your original file and then "save as" a .jpg file). Here is mine:

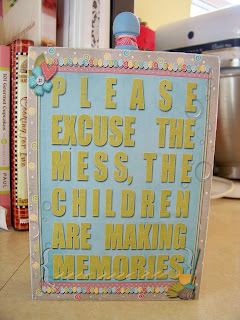
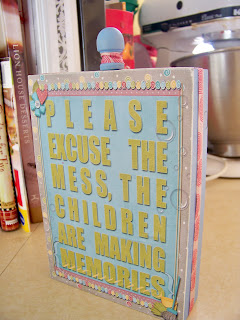
7. Now that you have your image, the sky is the limit as to what you do with it. You can print it professionally and have it framed, print it at home, or mod podge it like I did! I found a a 5x7 block of wood at a local wood/crafting store, a little decorative piece for the top, and some ribbon, and paint. I printed my image off at home. I love my printer and I use Premium Presentation Paper in matte (by Hewlett-Packard) to print my projects. It's beautiful and sturdy. I painted the block first and then applied wood glue to the back of my image (it just works better). Then I applied mod podge to front of the image (I use Hard Coat for projects like this because it protects it better). Finally, add some ribbon and voila! A new piece for our living room.
Have fun personalizing your own project! It would make a fun gift too!


Have fun personalizing your own project! It would make a fun gift too!


No comments:
Post a Comment