Tuesday, February 28, 2012

{Wacky Wednesday} Happy Leap Day, giveaways & early releases

Pin It

Some interesting Leap Day facts (courtesy of examiner.com)

The following fun facts about leap year were collected from Leapyearday.com and Womens-Place.com:

  1. Your chances of being born on a leap day are approximately 1 in 1500.
  2. There are about 187,000 people in the US and 4 million people in the world who were born on Leap Day.
  3. People born on Leap Day are called leaplings.
  4. In most states, leaplings must wait until March 1st to be eligible for any age-specific privileges (ages 16, 18, 21).
  5. Every now and then we have to skip a regularly scheduled leap year. This happens during specific century years.
  6. Century years are not leap years unless they can be evenly divided by 400. The years 1700, 1800 and 1900 were not leap years, but 1600 and 2000 were.
  7. When 2/29 is entered into a majority of websites it comes up as an invalid birth date.
  8. US Presidential elections and Summer Olympic Games are both held every four years and occur during leap years.
  9. In Greece, people believe it is bad luck to get married in a leap year. On the other hand, in Ireland, women can propose to a man.
  10. The next February 29th will come around again in 1,460 days.

Have any fun facts to share… or is today your birthday?


Head over to the Scrap Orchard blog to win my messy memories subway art or head to Wild Blueberry Ink to win a Cansolidator Pantry from Shelf Reliance. While over at Wild Blueberry Ink check out her Project Life freebies as well.


Leap day is here!  For one day only the new releases in the Market are 29% off.  I have two new items for you…

Create It {Leaves & Stems} by Krisi's Kreations


Create It {Flowers v.1} by Krisi's Kreations

Leap on over and grab them now.

I have to share this HUGE collection that Chelle’s Creations is releasing this week … and it is on sale for Leap Day as well.  You should see some of the layouts coming out of this collection – plus is is a great stash builder – use these to supplement kits you already have.  It is nearly 50% off with the bundle discount and the new release sale – grab it today!

Pin It

{Project Life} Week 8

Pin It

Seriously loving this project!   This week I remembered to use the day of the week labels (have to add them to my other weeks!).  I just love that as of Saturday I am caught up with 2012 scrapping… what an awesome feeling!

wk8a_webwk8b_web

wk8a_webwk8b_web

Products Used:

Valorie Wibbens – Pockets No. 3 The Basics
Miss Tiina – Live Free Love Life Freebie Journaling Cards
Gina Miller Designs – The Bliss Project Journaling Cards #1
Chelle’s Creations – Bug Catcher (background rainbow paper)

Check out Scrap Orchard’s blog post today – they are giving away one of my Subway Art templates.  Be sure to check out my blog tomorrow … I have some special Leap Day information!

Now… link up your digital pages here {a link back here is always nice… other people want to see more pages too!)


Linking up to

The Mom Creative

and

Pin It

Monday, February 27, 2012

{Monday Mix} Foam Dots

Pin It

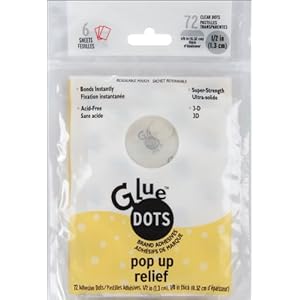
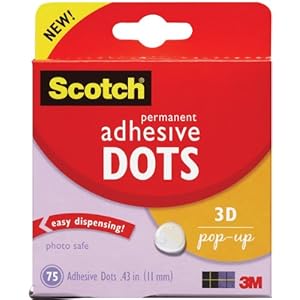
Hi everyone and welcome to another edition of Monday Mix. Today, I'd like to share with you one of the easiest ways to add additional dimension to any hybrid project: pop dots.

Pop dots are available in many different thicknesses and sizes. Similar to a glue dot, pop dots adhere but also have additional foam in order to create pop up and 3D effects.


In the project below, I used pop dots to accentuate the butterflies and flowers by attaching the additional pieces with 1/2 inch pop dots for the larger butterflies and 1/8 inch pop dots for the smaller flowers.
Next time you're looking to add some quick additional dimension to a project, reach for a few pop dots for that extra pop!

Pin It

Thursday, February 23, 2012

{Tutorial Thursday} Tumbler

Pin It

I was excited to work with this week's new release, the Tumbler insert. However, after looking at all the different tumblers I had, none of them seemed to come apart to change out the insert! I still wanted to work with it, so I went to Plan B. I decided to make an insert for just a regular plastic cup that I could give as a gift.


I looked at the template measurements, and then measured the plastic cup I was going to use.


At 2 1/2" shorter, I knew I would have to adjust the template slightly, so I just used the move tool to move the bottom of the template up to change the height of the template but not the width.


I then decorated it using Chit-Chat and Chocolate by Ann BV Designs and printed it out.


I used my tape gun to put a strip of tape on the edge.


Once glued together, it was ready to be placed in the cup.


After putting the insert in the cup, I filled it with yummy chocolate and it's ready to cheer someone up. Maybe me! It would have been better in a smooth cup, but sometimes you just have to go with what you have.

Pin It

Wednesday, February 22, 2012

{Wacky Wednesday} Organizing Wine Ephemera

Pin It

Hey there! Stopping in with a quick look at how I used Krisi's Jr. Legal Pad Cover to do some organizing...of my wine ephemera! I have collected snippets of this and pages of that and a couple of pamphlets along the way, and I thought it was time to put it all together into a wine dossier.

This is the template I used:


Krisi's template is (obviously) sized for a Jr. Legal Pad, but I found that a little thinking outside the box :) will get it to fit a small 6-ring binder, as well!


I started with the binder because I wanted to use a zipper pouch for more secure storage.


 When I printed the project, I printed an extra page, the "simple wrap", to make sleeves on the inside of the cover to slip the front and back of the binder into.

Here's the finished product:

Some notes from a tasting, and a map tucked into the pocket:

A short list of some of my favorites, and a piece of a label tucked into a pocket page:

Blank paper for future events, and the zipper pouch with extra clips and such:


The closed cover, secured with velcro:


Hope you are inspired!
LeAnn

Oh!  And I used the Free Fall kit from Sherwood Studios for this project.

Pin It

Tuesday, February 21, 2012

{Project Life} Week 7 & Digital Link Up

Pin It

Going to keep this short tonight – but will be back tomorrow to update the other side of my layout.

We went away for the long weekend and I worked tonight – so needless to say the second half of the weeks pages are not yet done. But here is my first page that I got done – from the help of Laura Banasiak & Emily Merritt designs and their fun kit called: XOXO; designs by lili – collage templates; and Valerie Wibbins for the overlays.


week7-1_webweek7-2_web

week7-1_web

week7-2_web

Thanks for stopping by.  Check out my Shelf Reliance / THRIVE food blog for information on a chance to win 4 pantry cans of THRIVE food.

Linking up with:  www.themomcreative.com and http://www.one-happy-mama.com/

Be sure to link up your digital pages – We would love to see them!  It is always nice to include a link back to here so others visiting your site can see other digital creations too!

Pin It

Monday, February 20, 2012

{Monday Mix} Inspired by Pinterest

Pin It

Hi, everyone, it's Rebecca (ReboScraps) here with a hybrid project inspired by Pinterest. I spotted this clean & simple project which makes a great sweetheart gift, and just loved the clean simplicity and personalization.
Source: etsy.com via Rebecca on Pinterest


With some more surfing, I spotted a birth announcement by the same creative mind, this image composed with big bold numbers.
Source: etsy.com via Rebecca on Pinterest


I decided to make my own birth memento, combining the image of the home state with birth statistics. There's a great font available that includes dings of each U.S. state and some other shapes, too. It's called "Ding Maps" and you can find it at Fontspace. I clipped a bright paper to the map, and a solid light grey to the background. Then I printed two copies, cut out the California shape, and attached it to the background using foam dots for extra dimension. I love how it turned out, and it was so easy! 
Product credits and suggestions:
- Digital Papers from Hole in One by Chelle's Creations
- See Through You Buttons by Chelle's Creations
- Fonts are Pharmacy MMX and Ding Maps

Pin It

Saturday, February 18, 2012

{Saturday Special} Featured at Ninth Street Notions - enter to win!

Pin It

Ninth Street Notions
 
Guess what I am hosting a SHELF RELIANCE THRIVE food giveaway over at Ninth Street Notions – a blog that I love to follow with great information!  Check out the post right HERE and don’t forget to enter and WIN!
 
I will be hosting a Krisi’s Kreations giveaway there in the future… so you want to keep an eye over there!

Pin It

Friday, February 17, 2012

{Friday Fun}

Pin It

The girls had so much fun working with this weeks template (Jr. Legal Pad Cover) I just had to show off the projects they created!

sharon
Sharon

leann
LeAnn

Jude
Jude – taking with her to DigiScrapApalooza – come!!!! use KRISISENTME to save $$$

legal_melanie
Melanie

legal_karen
Karen

and mine.


Jr. Legal Pad Cover by Krisi's Kreations
Bug Catcher from Chelle's Creations

And here is the template they used:

Pin It

Thursday, February 16, 2012

{Tutorial Thursday} Jr. Legal Pad

Pin It

It's Thursday and time for another tutorial!  It's Cathy here posting (Scrappycath) and I'm going to be showing you a project using the Jr. Legal Pad Cover released this week at Krisi's shop.

I'm also going to share a bonus tutorial on how to use templates with the Silhouette electronic cutter, even though there may be no cutting files!!


I used the digital kit Boy in Blue Jeans by Jady Day Studio. You don't have to use digital papers with Krisi's templates. She includes .pdf versions which you can trace onto "real" paper to create wonderful projects too. Lots of possibilities!

I wanted the papers that I used to be "double-sided" with patterned papers on both sides. So first I chose a digital paper from the kit to be the inside of my pad cover. I chose the large circle paper.  I then printed that on to one side of  two letter sized (8.5'x11") sheets of paper.  I have an inkjet printer and I used a paper by Red River called Polar White. It's a bit heavier than presentation paper, but displays the colors well, like presentation papers.

I then opened the .tif templates in Photoshop CS4 (the templates come in multiple file formats to work with all sorts of photo editing programs or just print the .pdf version to trace onto paper!). I clipped the digi papers that I selected to the appropriate areas of the templates: front, back, pad cover, and pocket.  I chose to use the scallop edge flap (turn off the template sections that you do not need). Also be certain to delete or turn off any instructional text layers, and reduce the opacity of the score lines.

Keep in mind that the right most edge of the front will be covered by the flap when it is closed.  If you want to see your embellishments when the flap is closed, keep them about 1.5" from the right edge of the front section.

At this point, you can print out the designed templates, cut them and move on to the scoring and assembling.  BUT, if you have a Silhouette electronic cutter, I've got a big tip for you.

Creating Print-and-Cuts for the Silhouette:
Here is what I do when I want to print-and-cut something on my Silhouette. In Photoshop, I merge all of the layers to create one layer for the item that can be printed and cut. Above is the image of my front design. I save this as a .jpg file and named it FrontPRINT.jpg.

I then add a layer above the design one in Photoshop. I fill that layer with black and clip it to my design layer.
This creates a black image of what I want to cut in the Silhouette software. I save this as a.jpg and named it FrontCUT.jpg. (Note: I have the Silhouette SD, not the Cameo, it has a smaller cutting area. I had to create separate files for the front and the pad cover)

Now open the Silhouette software. Open the PRINT file that you created, and then open the CUT file and line it up on top of the PRINT file. Hint: use the "centralize" tool to line them up exactly.  Turn on the registration marks, and be certain that your design is lined up inside them.

Select the Trace tool. Click and drag to select the design. When you have the design highlighted click "trace outer edge" (for this design we only need cut the outline, for more intricate designs, you'll want to select "trace" to trace outside and inside edges). Once you have the cut lines traced, you can drag the black "cut" file off the work space.  The project in your Silhouette software will look like the image above.

Now, using the Silhouette software, send it to the Silhouette, select to print it. I printed mine on the opposite side of the paper I had already printed on.
Once it has printed, with the registration marks, place it on your Silhouette mat and insert it into the Silhouette. On the software, select to continue and detect the registration marks automatically. Then cut your page!

Scoring and Assembling:
Once you have your design printed and cut, you are ready to score and assemble it.

Using a scoring board is really helpful to get a straight line. If you don't have a score board, I suggest placing your paper on top pf a magazine or on the back of a firm mouse pad or other thin foam mat. Then place a straight edge ruler along the score line, and use the back of a butter knife (not the cutting edge) to score the paper.


Add adhesive to the appropriate flaps and construct your pad cover.
This is how the project will look once the front and back are adhered.  Wrap the pad cover over the top of a junior size legal pad and adhere in place.  Place some adhesive on the back of the pad and adhere it to the inside back of the cover.

 Here are some images of the completed project.


I always keep a note pad at my desk to write down important things that I need to remember, to-do items, things my son says that I just don't want to forget. Now instead of a loose pad and pencil, I have a pretty packaged pad to help me keep my notes!

I hope you have fun creating a pretty covered pad too. By the way.....These would make great teacher gifts!!

Cathy (scrappycath)

Pin It