
Hi, everyone. I am Karen from Krisi’s CT. In the forums I usually go under the name of bydelstorp.
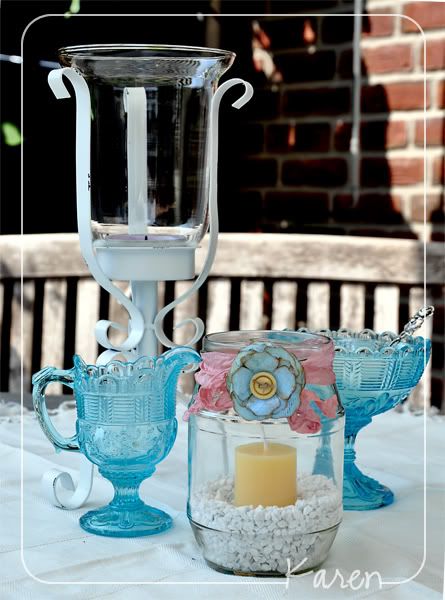
Today I want to show you how a recycled glass jar, a little sand or, as in my case, white stones , pretty ribbon and a few printed flowers can make a beautiful decoration for a summer table.

I used a gorgeously grungy paper from Serenity by Happy Scrap Girl Designs

And Krisi's Create it Yourself: Flowers v. 1

For my project I chose the flower at the bottom, which is really pretty and easy to cut out.
And here’s my printed page. I did not have enough to print to fill an entire page so I cut one up into quarters to get photo sized paper that I could put into my printer's photo tray.

As you can see I printed different sizes. I wanted to see how they turned out and then print more, but I then decided that layering the flowers in different sizes would be just perfect. You can also see that one of the flowers is slightly cut off at the edge. I never seem to get the paper perfectly aligned in my printer so I always need to keep an edge around my designs. Here I did not worry about the cut off edge since I wanted my flower to be grungy anyways and did not worry too much about accuracy when I cut them out, makes them more real.
Since I wanted my flower to be a little shabby and grungy, I distressed the edges and crumpled the flowers into little balls after I cut them out.

After straightening them out again I curled the petals around a brush handle to give them more shape. Anything round will work for this. I use whatever falls into my hands first. Chopsticks are great for this as well.


After I liked the shape of the single flowers I glued them together in layers. Again tweaking a bit here and there until I liked the shape, and added a button with twine to the center.
Then I tied some pretty ribbon around a recycled glass jar from the pantry, glued the flower to the bow with a glue dot and voilà I had a custom candle jar that matched the beautiful milk and sugar set that I inherited from my great grandmother.
Thanks for stopping by the blog today and I hope you enjoyed my little tutorial.
Karen


Karen, this was excellent!!
ReplyDeletethanks for the great ideas, love how you did your flowers, and the great photos. Love the whole concept.
ReplyDelete