Showing posts with label Valentines. Show all posts

Thursday, February 9, 2012

{Thursday Tutorial} Candy Cover

Pin It


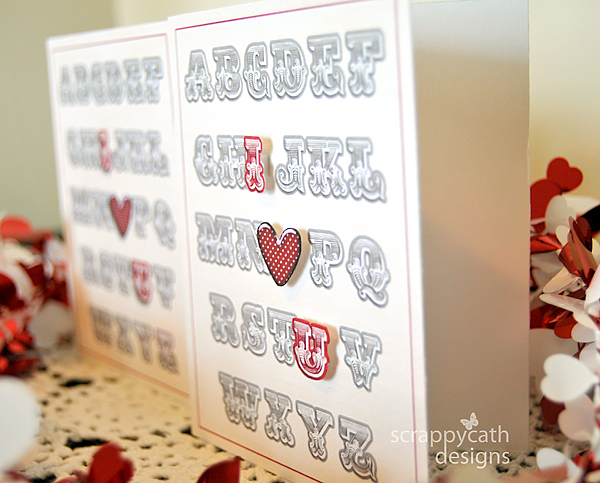
Hey everyone -- Heather (isaacsmom) here. Today I have a tutorial using Krisi's Candy Covers Volume 1. - which is new this week. I absolutely love this little project -- it is perfect for a last minute gift for Valentine's Day!

I used Krisi's Candy Covers Volume 1 -- you can find it here.


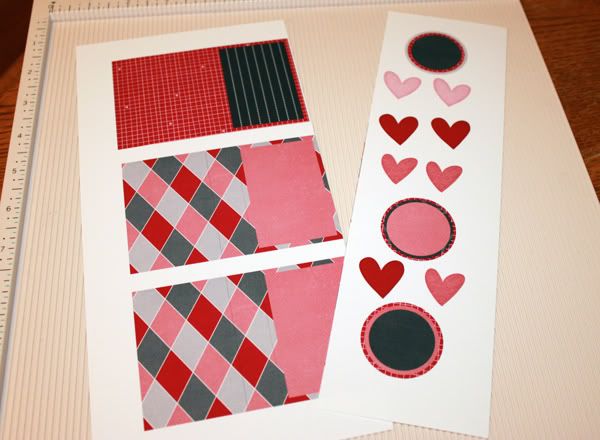
and the kit I used is Techno Love by Chelle's Creations:


I first opened the Candy Cover template in PSE 9 and clipped the papers I chose to the template. Then I printed them on my printer. I chose to use Epson Premium Matte Presentation Paper.


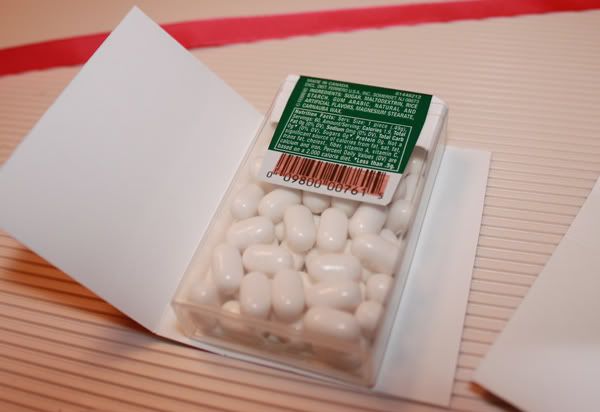
I also went ahead and gathered the supplies I need for this project: tic tacs, cutterbee scissors, red tape, scoring tool (not pictured) and miscellaneous ribbon.


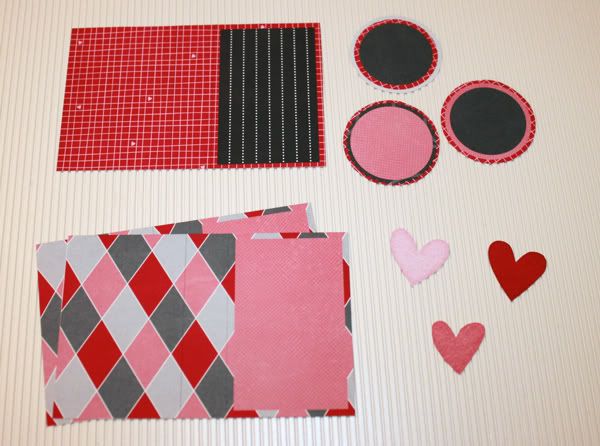
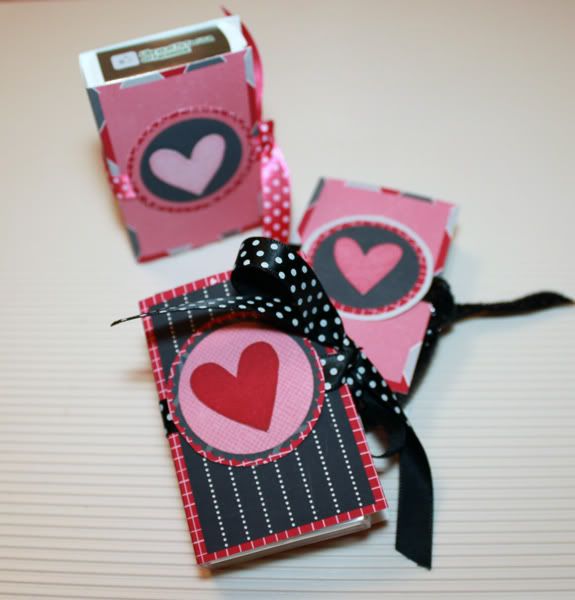
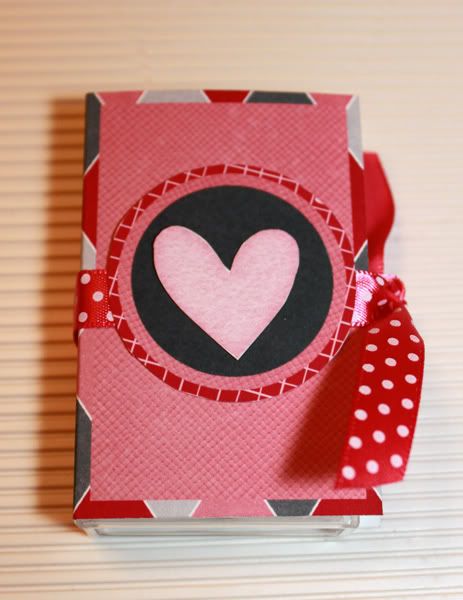
Next, I cut out all of the items. You will notice that I also printed a few hearts from the Techno Love kit to use as an embellishment on the front of my candy cover.

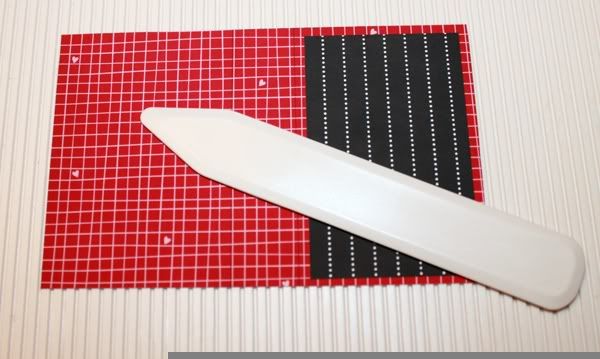
Next I used my score tool to score the lines on the cutouts.


Then I added a small strip of red line tape to the back of the tic tac box to adhere it to the candy cover.


Then I used some ribbon to tie up these cute candy covers. For the bow, I used a piece of ribbon about 18" long. For the simple knot, I used a piece of ribbon about 10" long. Lastly, I used some red line tape to adhere the circles and hearts to the front. At this point, you could use anything you wanted to embelish the front -- a button, word art, etc -- the possibilities are endless!


So simple! And now I have the perfect gifts for my son to give his teachers at school for Valentines Day!

I hope you have fun creating your own projects! Please link me up in the comments section if you try out this product! I'd love to see your finished creation!
Heather (isaacsmom)

Pin It

Monday, January 30, 2012

{Monday Mix} Hybrid vs. Printable

Pin It

This is the time of year for healthy competition. The NFL Conference playoffs are completed and the Super Bowl is just around the corner, The Daytona 500 is coming up, and the Rumble in the Orchard is going strong! Design Teams for the various designers at Scrap Orchard are having fun and providing lots of inspiration. Stop by when you get a chance and vote for Krisi's team!

All this competition got me to thinking about hybrid crafting and the many options it opens up to a paper crafter. It's Cathy (Scrappycath) here with a look at two different ways to make a hybrid card using digital elements.  I'm going to compare a "digital printable", and a "print, cut and assemble" card.


In the photo above, which card is a digital printable? Which one is print, cut, and assemble?  Can't tell?  A digital printable is a card that you design using your photo editing software completely and then just print it out. A print, cut, and assemble card is one that you design in your photo editing software, but print elements separately, cut them and build the card physically.  Each way gives you a beautiful card.  So, do you give up on which card is which?  Keep reading....


I created the cards in Photoshop using the Wall Art: i {heart} u and ABC's template by Krisi's Kreations. I also used the alpha from the digital kit My History by WM Squared Designs. I recolored the I and the U with a digital paper from another digital kit, Je t'aime also by WM Squared Designs. The heart is from a digital kit called Rebel by Joyful Heart Designs.  On one card design, I included the I, heart, and U with shadow. On the other card I printed those elements separately. I cut them out and adhered them to the card using foam dots.

Have you figured out which card is which?


The one on the right is the print, cut, and assemble.  By this angle, you can see how I raised the I, heart, and U using the foam dots. This really gives the card dimension.  If you are mailing your card, you may not want the added dimension.  In that case, you can simulate the look of the raised elements by applying a deeper shadow to the elements in your software before printing them out.

There you have it. Two different ways to create the same beautiful hybrid card!

Pin It

Thursday, January 26, 2012

{Tutorial Thursday} Pillow Door Hanger and Accordion Flowers!

Pin It

Hello, there! LeAnn, here.
Today is a tutorial on using a couple of Krisi's products together:

Accordion Flowers:


and the Pillow Door Hanger:


For this project I used the "She's All That" kit from Jady Day Studio.
Her designs can also be found at Scrap Orchard.


After I clipped the papers to Krisi's template and printed, here's what I had gathered:


Next, I scored the fold lines with my bone scoring tool. Then, I cut out the pieces and folded along the score lines. I accordion folded the strips for the flowers and glued the strips together for the larger flowers. For a detailed tutorial on assembling the accordion flowers see this post HERE.


Then I glued the piece called the "back" to the inside of the hanger.


Next I folded the pillow over and glued the flap closed, as well as folding up the bottom and gluing that. The hanger part is now done!

Next up, finishing the flowers. First I glued the ends of the accordion strips together to form a circle. After they dry, I like to cut circles out of scrap paper and use hot glue to hold the flattened-out flowers together. No one will see the backside, anyway, right? :)


After gluing some buttons in the center front of the flowers and paper strips to the back, I arranged them in the pocket of the door hanger. Its a pocket full of posies!

You could get creative with what you use for the center.
How about candies? (You might even find a way to have them remain edible!) You could also attach pipe-cleaners to make stems, or even rolled paper. Get creative!

My favorite configuration, however, was when I used one of the smallest flowers as the center of the flower on the pocket, and filled the pocket with kisses! Yum! :)
Lots of ways to create, and you don't even have to end with what you started out to create! :)


Hope you enjoy working with these products!
LeAnn

Pin It

Monday, January 9, 2012

{Monday Mix} Gleening inspiration from Pinterest

Pin It

I try not to spend to much time on Pinterest – it is awfully addicting! I have found that I like to browse on my iPhone and pin ideas there.  I have pinned a few Valentine’s projects that would work beautifully as hybrid projects – here are a couple of them.

When I first saw this one I immediately thought of the fun bright colors in so many digital kits – the back part and the robot could all be digital and just add the candy bar wrapped in digital paper, google eyes and the felt heart.  Love it!

Source: bhg.com via Krisi on Pinterest


So many fun zoo kits out there… this would be fun and simple digital!

Source: fiskars.com via Krisi on Pinterest


How easy would these be? Create the scallop tag digitally and simply punch them out!


And then there is this template that I previously released. It is not yet in my store at Scrap Orchard but if you want it to be… let me know and I will get that done!


Have you made something from Pinterest using digital supplies? I would love to see – link me up to where you posted them in a gallery!

If you would like to follow me over on Pinterest you can find me here.

Pin It